The Review page is a workspace for reviewing multiple documents and entering or editing document metadata. It provides you with tools to rapidly perform these tasks and establish a workflow for reviewing documents and attaching high quality, consistent metadata to them.
Performing Document Review & Data Entry
The Review page is designed to help you quickly enter, edit, and verify metadata for documents you are interested in.
The Review page helps you to:
The Review page helps you to:
- Retrieve the set of documents you're interested in by using filters and extracts.
- Focus on a set of metadata fields you're interested in modifying.
- Review documents, or targeted portions of documents, to determine what metadata needs to be entered.
- Make a large number of edits to multiple documents quickly.
1. Retrieve the set of documents you're interested in
Use the filters and sorting tools to display the documents you want to work with.
2. Select the metadata fields you want to work with
When the Review page initially loads, only a limited number of fields for each document are shown. These fields are intended to provide basic information to help you identify what each document is. At the top of the screen is a "Show Columns" button, which is where you can select additional fields to display. You will use this to select the fields that you specifically want to focus on and work with.
Use the filters and sorting tools to display the documents you want to work with.
2. Select the metadata fields you want to work with
When the Review page initially loads, only a limited number of fields for each document are shown. These fields are intended to provide basic information to help you identify what each document is. At the top of the screen is a "Show Columns" button, which is where you can select additional fields to display. You will use this to select the fields that you specifically want to focus on and work with.
Why might you want to take this approach of only working with a few fields at once?
Organizations often want to track a large number of fields for each document. The traditional approach is to review documents one-by-one, filling out all the fields for a document before moving on to the next one. Aerofiler lets you adopt a different approach, letting you quickly fill out a single field for multiple documents.
We believe this is a more efficient approach for two reasons:
- improved mental focus - it is easier to review a set of documents looking for a single concept, than to review a single document looking for multiple concepts. With the latter approach, you need to keep shifting your focus between the different concepts you're looking for (and it can also be demoralizing to have to fill out 30 metadata fields before you can move on to the next document). With the former approach, you only need to focus on a single concept and, when that is repeated across multiple documents, you will quickly get used to reviewing them for that concept
- it's task oriented - when you're looking up metadata, you're often trying to understand a specific attribute for one or more documents, rather than trying to know everything about a single document (for example, which contracts are renewing next month? Or what vendor agreements have assignment consent provisions?). This approach caters to that reality, by allowing you to prioritize and fill out metadata for fields that matter the most.
3. Review documents to determine what metadata to enter
When editing metadata fields, there are two tools you can use to determine what the correct metadata values are: (1) the document viewer, and (2) the Extract tool.
 Document Viewer
Clicking on the magnifying glass at the end of each document row lets you quickly view a copy of the document without leaving the page. You can also search for text in the document, as long as the PDF contains searchable text (some scanned PDFs are not searchable in this way).
When editing metadata fields, there are two tools you can use to determine what the correct metadata values are: (1) the document viewer, and (2) the Extract tool.
Document Viewer Clicking on the magnifying glass at the end of each document row lets you quickly view a copy of the document without leaving the page. You can also search for text in the document, as long as the PDF contains searchable text (some scanned PDFs are not searchable in this way).
Extract Tool
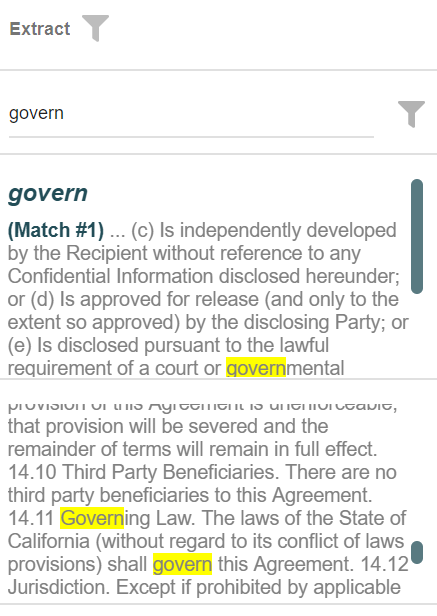
The Extract Tool is a powerful tool for running a search across the text of multiple documents. The extract tool is able to search through the full text of PDFs, even if the PDF is not "text searchable" (which is the case for documents scanned without OCR).
Under the "Extract" column (if it is not shown, click "Show Columns" and select "Extract"), you can type a search query into the filter field under the column heading.
Aerofiler will then run a search for that term across all documents currently listed in the document table, and return extracts from the document where the search term was found, plus text surrounding the search term so you can see it in context.
The Extract Tool allows you to pull out relevant language from many documents at once, which will accelerate your ability to review document language and fill out metadata.
Aerofiler will then run a search for that term across all documents currently listed in the document table, and return extracts from the document where the search term was found, plus text surrounding the search term so you can see it in context.
The Extract Tool allows you to pull out relevant language from many documents at once, which will accelerate your ability to review document language and fill out metadata.
4. Edit the metadata
- You can edit table cells by double clicking on them to put the cell into edit mode.
- You can also use the keyboard to navigate between cells and edit them.
- Cells that are shaded pink highlight data that has not been edited or validated by a person. If the cell already contains a value, that is because Aerofiler attempted to automatically detect the value based on its analysis of the relevant document's contents.
- Cells that contain system fields cannot be added (these appear in a gray color)
- When a cell is in edit mode:
- Pressing "Esc" will undo any changes you've made.
- Pressing "Enter" or clicking outside of the cell will cause the cell to flash green to indicate it has been saved. If the cell was previously shaded in pink, it will then turn white to indicate the field is validated.
- If you have multiple documents selected, you can use the Bulk Edit button (accessible via the Actions button) to modify a single field to a specified value for all the documents you've selected.
Filter Contracts
The "Filter Contracts" button:
allows you to filter by the following types of contracts:
- Inactive - these are contracts that are expired or have been superseded
- Active - these are contracts that have not expired and have not been superseded
Views
The "Views" button:

allows you to create, modify and delete Views. A View can be used to store:
- Column Layouts
- Filters
For example, suppose you want to create a View for the Finance team displaying only contracts above a certain value. To do this, begin by applying a filter:
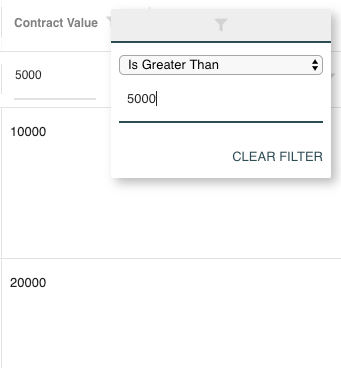
Then click "Views" -> "Save as New"
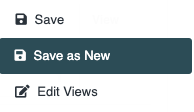
choose a name, for example "Finance View":
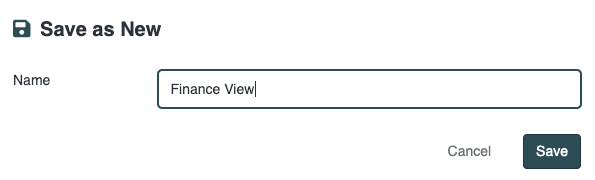
Once the view is saved, you will have a link which will allow you to share the View:
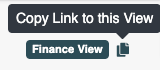
Only the View itself is shared. Users will still only be able to access data in accordance with the permissions set by Administrators.
An Example Workflow
Imagine that you are working with your IT security team on security incident response planning. You know that some customers have contractually required you to notify them if a security incident occurs. In the event of a security incident, the IT team needs to know who these customers are so that they can prepare the necessary communications for them. Your task therefore is to review all your contracts with customers and flag which ones have these "security incident notification obligations". The workflow below is one way you could approach this task.
Assume that you have created a custom "Security Notification" field that will be set to "True" if a contract requires you to notify the counterparty of a security incident.
1. Retrieve the set of documents you're interested in
In the Review page, start by filtering the Document Type field by "Sales" documents to only show customer contracts. You might also choose to filter by a certain document title (e.g. "Services Agreement"), if all your customer contracts have the same standard title.
2. Select the metadata fields you want to work with.
Use the Show Columns button to display the "Security Notification" field in the document table.
3. Review documents to determine what metadata to enter
You now have a list of documents that you need to individually review so you can enter the appropriate "Security Notification" values for them. Then:
Assume that you have created a custom "Security Notification" field that will be set to "True" if a contract requires you to notify the counterparty of a security incident.
1. Retrieve the set of documents you're interested in
In the Review page, start by filtering the Document Type field by "Sales" documents to only show customer contracts. You might also choose to filter by a certain document title (e.g. "Services Agreement"), if all your customer contracts have the same standard title.
2. Select the metadata fields you want to work with.
Use the Show Columns button to display the "Security Notification" field in the document table.
3. Review documents to determine what metadata to enter
You now have a list of documents that you need to individually review so you can enter the appropriate "Security Notification" values for them. Then:
- In the Extract filter, type in "breach notif"
- All documents that contain the phrase "breach notif" will be displayed, and the Extract column will be populated with excerpts from each document that contain that phrase.
- Scroll down through each match to review the language
Tip: You can also use the Extract column with the Export Data button to export all displayed extracts of language to a spreadsheet.
4. Edit the metadata
- When you review the language in the Extract column for each document, select the documents that contain a breach notification clause
- Click on Bulk Edit
- In the Bulk Edit popup box, Set "Breach Notice" to "True"
- And you're done!
Document Permissions
If you do not have sufficient permissions to see a document, this will be noted in the top right corner of the page. A user must have Read permissions for a document in order to view it on the Review page, and Edit permissions to edit fields and validate documents. Permissions may exist for individual documents, or for categories of document types.
Comments
0 comments
Please sign in to leave a comment.